Difference between revisions of "Server Setup"
Mayor Mike (talk | contribs) (→World Backup) |
Mayor Mike (talk | contribs) m (→World Backup) |
||
| (3 intermediate revisions by the same user not shown) | |||
| Line 110: | Line 110: | ||
*Once the above has been completed, test the backup.sh by issuing the <code>/backup</code> command. You should see something similar to the image below. | *Once the above has been completed, test the backup.sh by issuing the <code>/backup</code> command. You should see something similar to the image below. | ||
[[File:Backup.png|500px]] | [[File:Backup.png|500px]] | ||
| + | |||
| + | *If you get an error saying "No such file or directory" ensure the backup.sh is in the correct location and named correctly. | ||
| + | *If you get a "Permission Denied" error, ensure the file has the proper Execute permissions. | ||
<div class="toccolours mw-collapsible mw-collapsed" style="width:400px; overflow:auto;"> | <div class="toccolours mw-collapsible mw-collapsed" style="width:400px; overflow:auto;"> | ||
| Line 159: | Line 162: | ||
=== Using LuckPerms === | === Using LuckPerms === | ||
| + | LuckPerms is an incredibly easy to use permissions plugin. While detailed usage is documented on their [https://luckperms.net/wiki/Usage wiki], basically all you need to know is how to access the editor. | ||
| + | |||
| + | *In the console or from a user with appropriate permissions, issue <code>/lp editor</code> and you will be given a link to visit. | ||
| + | *Do not share the edit link. It can be a way to allow anyone the ability to modify the server's permissions! | ||
| + | [[File:LpEditor.png|500px]] | ||
| + | *Select a group or user, modify the permissions, and click save. | ||
| + | [[File:LpEditor2.png|500px]] | ||
| + | *Once you click save, you will get a command to enter | ||
| + | [[File:LpSave.png|500px]] | ||
| + | [[File:LpSave2.png|500px]] | ||
| + | *Finally either test the permissions yourself or have a user test them. | ||
| + | |||
=== Setup === | === Setup === | ||
This section details all the requirements/suggestions for setting up a new version of The Phoenix, except for what was listed above. It is important to understand updating the server jar and Dynmap before continuing with the rest of the setup. Without those two in place portions of the setup could fail or result in long term problems. | This section details all the requirements/suggestions for setting up a new version of The Phoenix, except for what was listed above. It is important to understand updating the server jar and Dynmap before continuing with the rest of the setup. Without those two in place portions of the setup could fail or result in long term problems. | ||
If you are ready to continue setup, go here: <WAITING TO WRITE> | If you are ready to continue setup, go here: <WAITING TO WRITE> | ||
Latest revision as of 23:06, 13 June 2021
Quick guide to setting up the MC server for Admins to follow and to manage the DoI, Terraria and Valheim servers. While the information here is specific to this server, it can be adapted for pretty much any other use case as well.
This guide assumes you have some basic Linux/BASH knowledge.
Contents
Getting Started
First, tools needed to get the job done.
Required:
- Terminal Emulator. I personally just use SSH session in a Windows Subsystem for Linux (WSL) shell. You can also just do SSH from CMD, BASH shell or PuTTY.
Recommended:
While you can manage it all just in the Terminal, these tools make things significantly easier and more organized.
Starting Software
Hopefully you will not need to do this, but if there is a power failure or a full system reboot for some reason these steps are important.
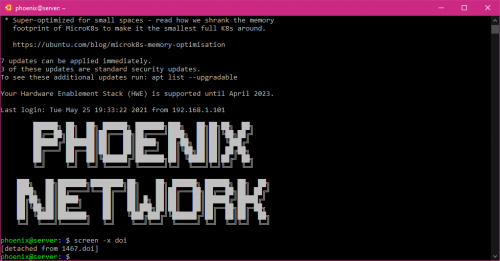
- Login to the server. You will see the Welcome Screen.
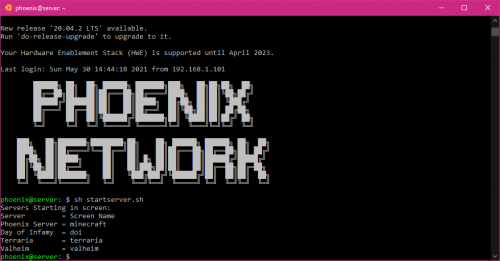
- Run
sh startserver.shand you will see the below:
- All servers listed will start up in their own screen with the associated name. If you cannot remember the name of a screen just issues
screen -ls - To exit a screen issue
Ctrl+A, D
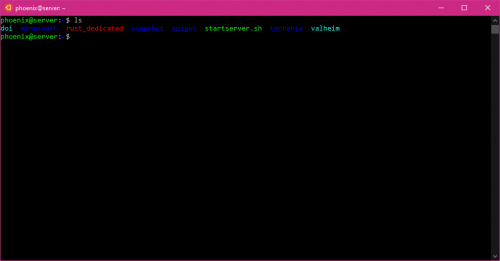
All servers are located or synlinked from the home directory.
Day of Infamy
Day of Infamy is the easiest server to start. It should just be running with the initial start script from before.
Restart Server Software:
screen -x doiCtrl+Cto close the server.sh start.shto start the server.
Valheim
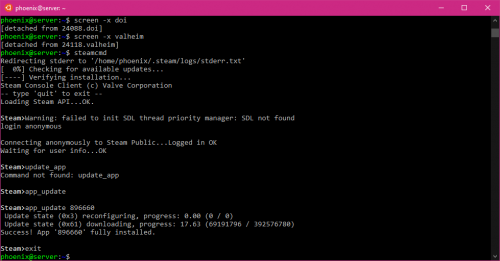
Valheim is a bit more complicated. It is still getting updates and requires SteamCMD to update. Below are the steps to update the server and change some details, like port number, World, etc.
Updating Server Software:
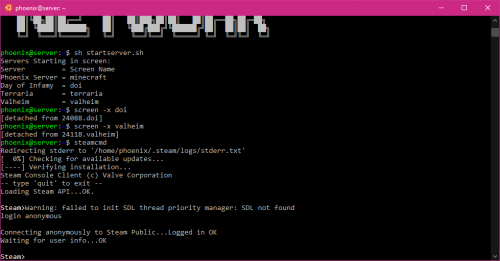
screen -x valheimCtrl+Cto stop the server.steamcmdto open the SteamCMD client.login anonymousto login without an account.
app_update 896660to update the game. Wait for it to download/install.exitto exit SteamCMD.
sh start.shto start the server again.Ctrl+A, Dto exit Valheim's screen.
World Files
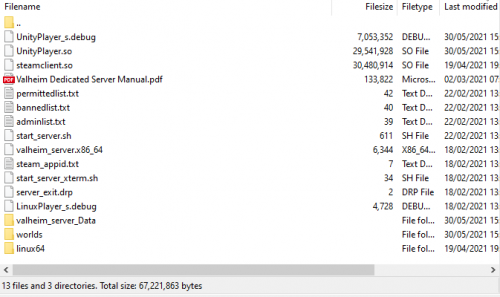
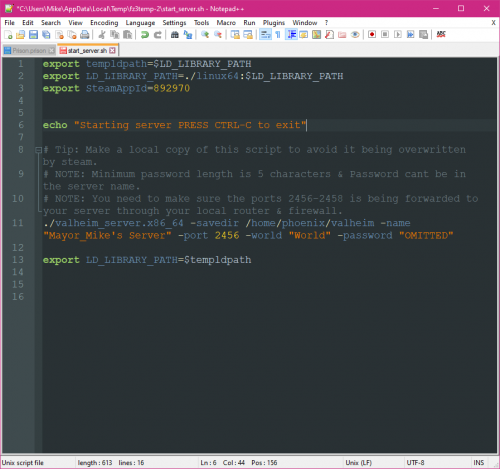
Located at ~/valheim is the start_server.sh that controls some options and starts the server. Most importantly it allows you to change the world and set the server's password. Also ~/valheim has the worlds directory. Either delete the old world from the directory or change the name in start up script to have a new world.
Terraria
Terraria doesn't get updates via SteamCMD, but from Terraria's website. Below details how to update the server and how to manage worlds.
Updating Server Software
- Shutdown the Terraria server software
screen -x terrariaexit- Server software will shutdown and save the world.
- Go to Terraria's website
- Scroll to the bottom of the page and locate PC Dedicated Server
- Download the ZIP.
- Upload the contents of the ZIP to
~/terraria, replacing anything prompted. - Start the server again by running
sh start.sh
World Files
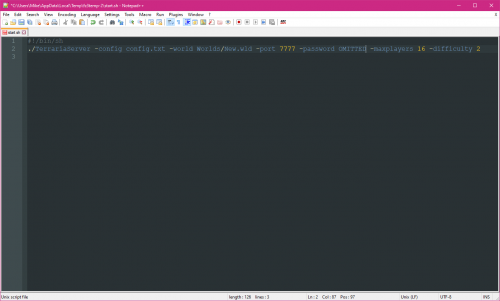
Similar to Valheim, world files are located in a Worlds directory, all in one area. Either delete the old world, or change the name in the start.sh
Minecraft
The Minecraft server is the most complicated one to manage. Below will detail general setup between versions, updating the spigot.jar, checking and managing permissions, setting up Dynmap on the 1TB HDD, setting up the auto world backups from Essentials.
Updating Spigot.jar
- Login to the server
cd spigot
This directory is where BuildTools.jar and the spigot.jar are located. To build a jar do one of the following
- Build the current reccomended spigot.jar version:
java -jar BuildTools.jar - Build a specific spigot.jar version:
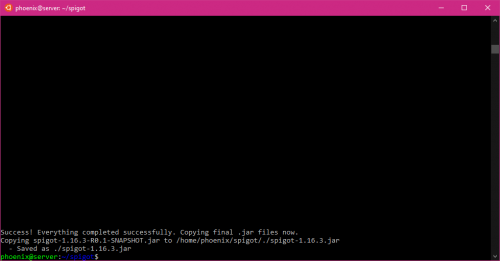
java -jar BuildTools.jar --rev $Versionreplacing $Version with a number, like 1.16.3 - Wait for the jar to compile. May take awhile depending on if it is a newer or older spigot version. When completed you will see the below:
- Stop the server
screen -x minecraft stop
Ensure the server is not backing up the world! It will cause MC's Watchdog to crash the server resulting in data loss
- If the server is a new version, open
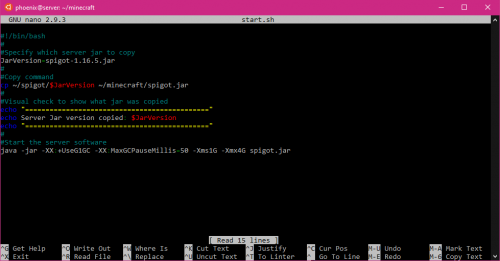
~/minecraft/start.shin your favourite text editor and edit the $JarVersion value to have the correct version referenced. The example shows 1.16.5
- Save the file and when you start the server the script will copy the jar and start the server.
- Note. Sometimes BuildTools.jar will not run and request you to download an update. You can download BuildTools.jar from Spigot here: BuildTools.jar Jenkins
Dynmap
World Backup
World backups are pretty easy and have a drop in file. There are only a few things you need to ensure.
- The backup directory exist
- The backup.sh file has executable permission
- The server's user has read/write permissions to the directory.
- The backup.sh file is located in the server's root directory (same directory as spigot.jar, world files, etc.)
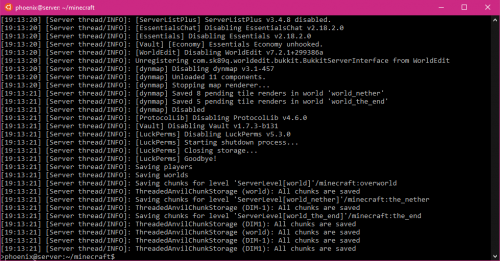
- Once the above has been completed, test the backup.sh by issuing the
/backupcommand. You should see something similar to the image below.
- If you get an error saying "No such file or directory" ensure the backup.sh is in the correct location and named correctly.
- If you get a "Permission Denied" error, ensure the file has the proper Execute permissions.
#!/bin/bash
# Set these values to match your server's settings.

# This script should be located in the craftbukkit folder

# Make sure you change this to the name of your world folder!
# Add additional worlds by separating them with a space.

declare -a worlds=(world world_nether world_the_end)
backupdir=/media/1TBdrive/worlds/
ext=.zip

hdateformat=$(date '+%Y-%m-%d-%H-%M-%S')H$ext
ddateformat=$(date '+%Y-%m-%d')D$ext
numworlds=${#worlds[@]}

    echo "Starting multiworld backup..."

    if [ -d $backupdir ] ; then
        sleep 0
    else
        mkdir -p $backupdir
    fi
    #zip $backupdir$hdateformat -r plugins
    for ((i=0;i<$numworlds;i++)); do
        zip -q $backupdir$hdateformat -r ${worlds[$i]}
        echo "Saving '${worlds[$i]}' to '$backupdir$hdateformat'."
    done
    cp $backupdir$hdateformat $backupdir$ddateformat
    echo "Updated daily backup."
    find $backupdir/ -name *H$ext -mmin +1440 -exec rm {} \;
    find $backupdir/ -name *D$ext -mtime +14 -exec rm {} \;
    echo "Removed old backups."

    echo "Backup complete."

exit 0
Using LuckPerms
LuckPerms is an incredibly easy to use permissions plugin. While detailed usage is documented on their wiki, basically all you need to know is how to access the editor.
- In the console or from a user with appropriate permissions, issue
/lp editorand you will be given a link to visit. - Do not share the edit link. It can be a way to allow anyone the ability to modify the server's permissions!
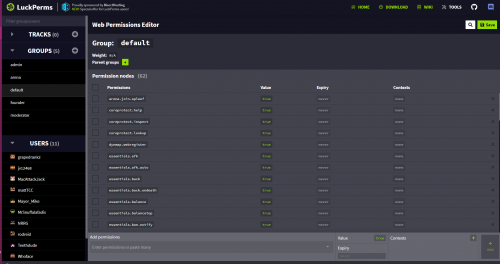
- Select a group or user, modify the permissions, and click save.
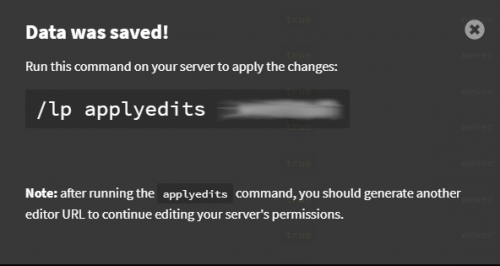
- Once you click save, you will get a command to enter
- Finally either test the permissions yourself or have a user test them.
Setup
This section details all the requirements/suggestions for setting up a new version of The Phoenix, except for what was listed above. It is important to understand updating the server jar and Dynmap before continuing with the rest of the setup. Without those two in place portions of the setup could fail or result in long term problems.
If you are ready to continue setup, go here: <WAITING TO WRITE>
